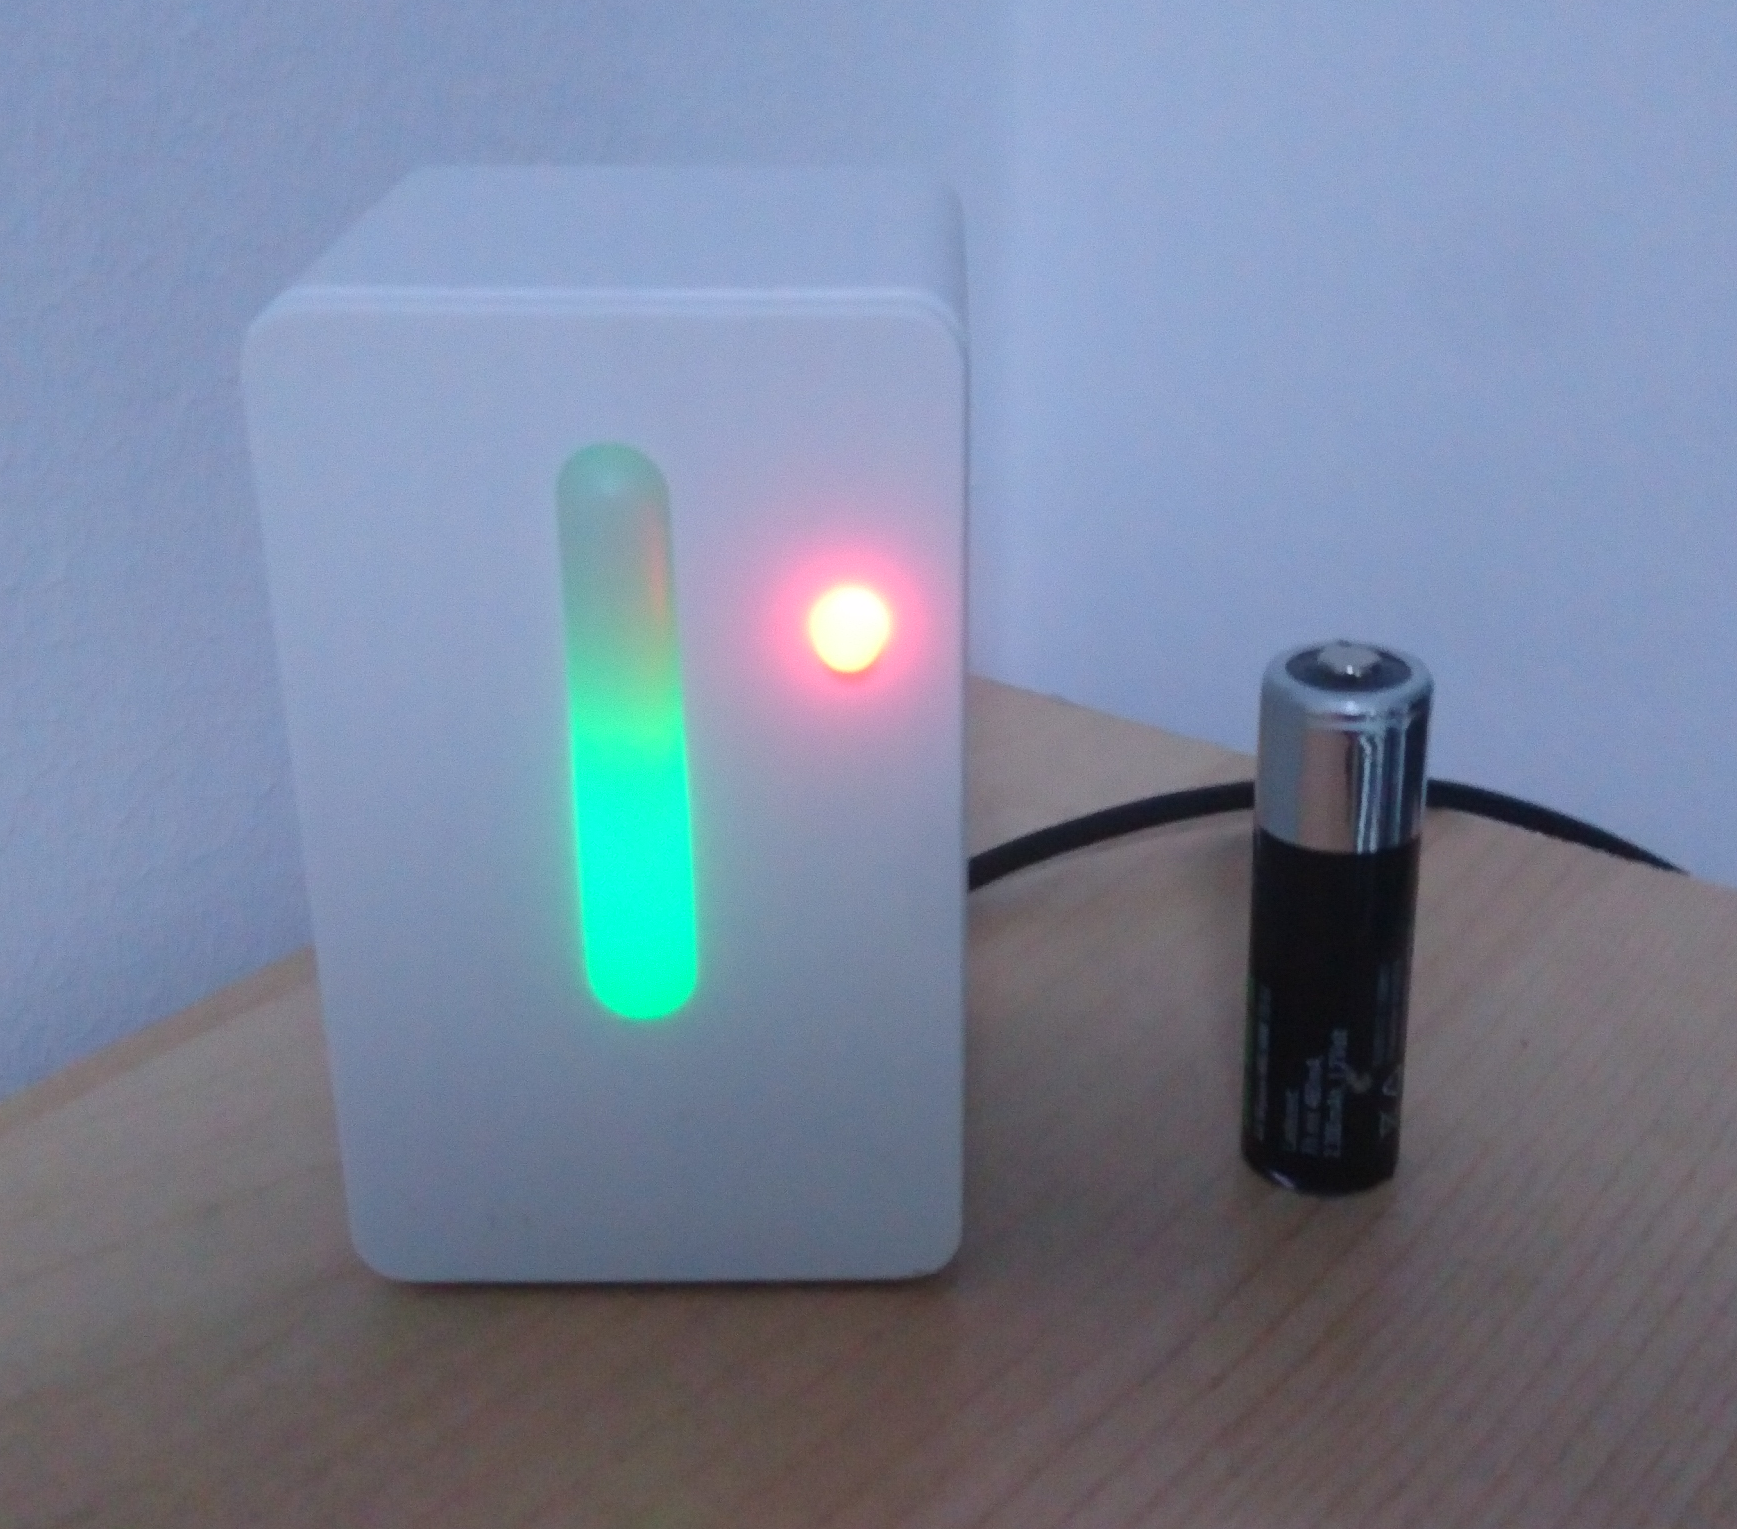
Ikea Sensor
Here is how it now looks like, ‘AA’ type battery for scale:
Ikea has this surprisingly cheap, somewhat accurate and quite living-room-compatible sensor called VINDRIKTNING. In its current state, it displays the particulate matter concentration in a traffic light style display. Of course, lots of people started to pry it open immediately, and tried to make it smarter, using an ESP microcontroller or similar.
I went one step further, and added a Bosch BME680 air quality sensor (measuring temp, humidity, pressure and VOC). As an added bonus, I threw in a second multi-color LED to show the computed IAQ from the BME680.
Hardware-wise, I just crammed an ESP8266 and the BME680 breakout in there and connected everything. I did not bother with any sophisticated ways to generate the 3.3 V for the ESP, I just soldered two diodes in series and hooked it up to 5 V. Not exactly the right way™, but it drops the voltage for the ESP down to around 3.5 V, and it has been running without issues for some months now.
Then, I drilled a hole in the front and glued the additional LED in, which is controlled by the ESP. I chose some random three-pin multicolor LED I found in my random parts box. It has one common pin, one for red, one for green, and if you power both, you get something yellow-ish. Likewise, I did not bother with current limiting, and so far, nothing went up in flames. Not sure if the LED has internal resistors or if the GPIOs are somewhat current limited, but it seems to work for now.
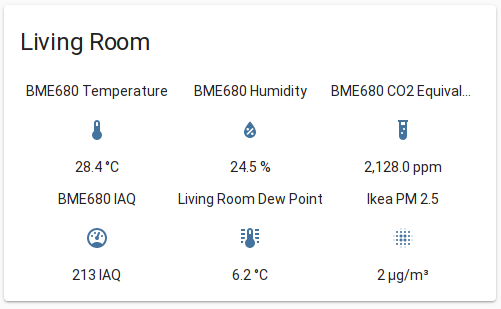
For the software, I have switched from something home-made to the great ESPHome, which now brings support for the official closed-source Bosch library. Code is here. All the values get reported to my MQTT server and are displayed on Home Assistant. A word of warning though, having the sensor in the same enclosure with all the other stuff will influence the temperature readings. I recommend running your sensor for a bit until everything is warmed up, and then calibrating the offset with a known-good thermometer.